| |
| Unit
Identification |
|

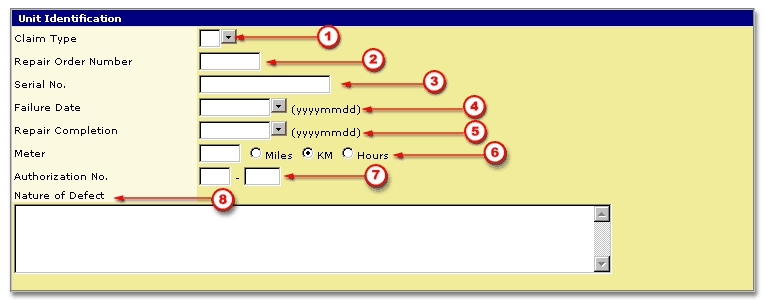
To fill out the Unit Identification screen area:
|
Okay, now that the top part is filled out.
Scroll down to the next section and fill in the details of each repair.
|
|
| |
| Repair
Section |
|

|
 |
You can
add as many repairs for a vehicle as you want in the same claim. |
 |
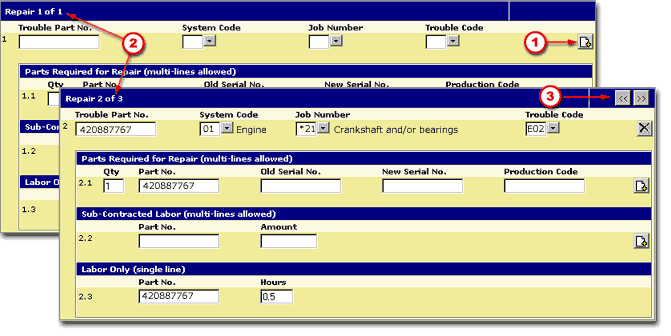
On the screen,
this will result in the section you see now labelled as Repair
1 of 1 being repeated as other repairs in the same system or another
system at the same time (repair 2 of 3, 3 of 3, and so on).
|
 |
You will be able to navigate between repairs
with the arrows ( 
 ).
).
More than one part can be entered for different systems, this lets
you completely repair a unit on the same claim.
|
 |
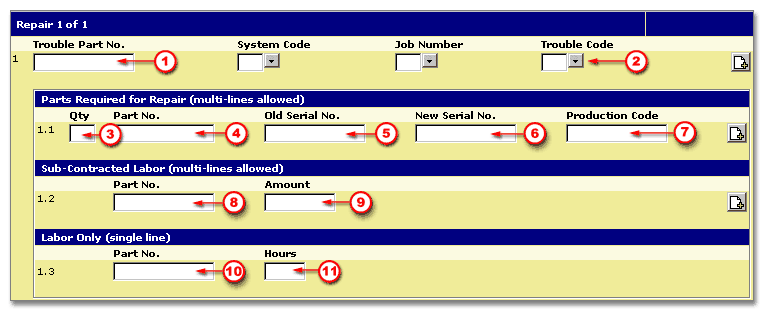
Repair 1 of 1
Parts Required for Repair (multi-lines allowed)
 |
Fill in the Quantity. |
 |
The Part No. |
 |
The Old Component Serial
No. (required only if you are replacing an engine
assembly (not a short block) or a snowmobile track, otherwise
no information is required here) |
 |
The New Component Serial
No. (required only if you are replacing an engine
assembly (not a short block) or a snowmobile track, otherwise
no information is required here) |
 |
And the Production Code
(when required). |
| |
For this screen area, multiple
lines of information are allowed, meaning that you may require
more than one part to do this repair.
To add a part, click on  . . |
Sub-Contracted Labor (multi-lines allowed)
 |
Fill in the Part No. |
 |
and Amount, before taxes. |
| |
For this screen area, multiple
lines of information are allowed, meaning you might need sub-contracted
labor for this repair. To add an additionnal line for sub-contracted
labor, click on  . . |
Labor only (single line)
 |
Fill in the Part Number. |
 |
and Hours. If
you add hours in this line, it will give you extra time.
You have to justifiy this time in the Nature of Defect
section. We can accept to pay for extra time when
it is well justified and out of the normal procedure to repair
a failure. |
|
Once the claim is complete, you must first
click on the Verify  button and then you can either choose to Save
  or Submit
  . .
Click on the Next button  to proceed with this lesson.
|